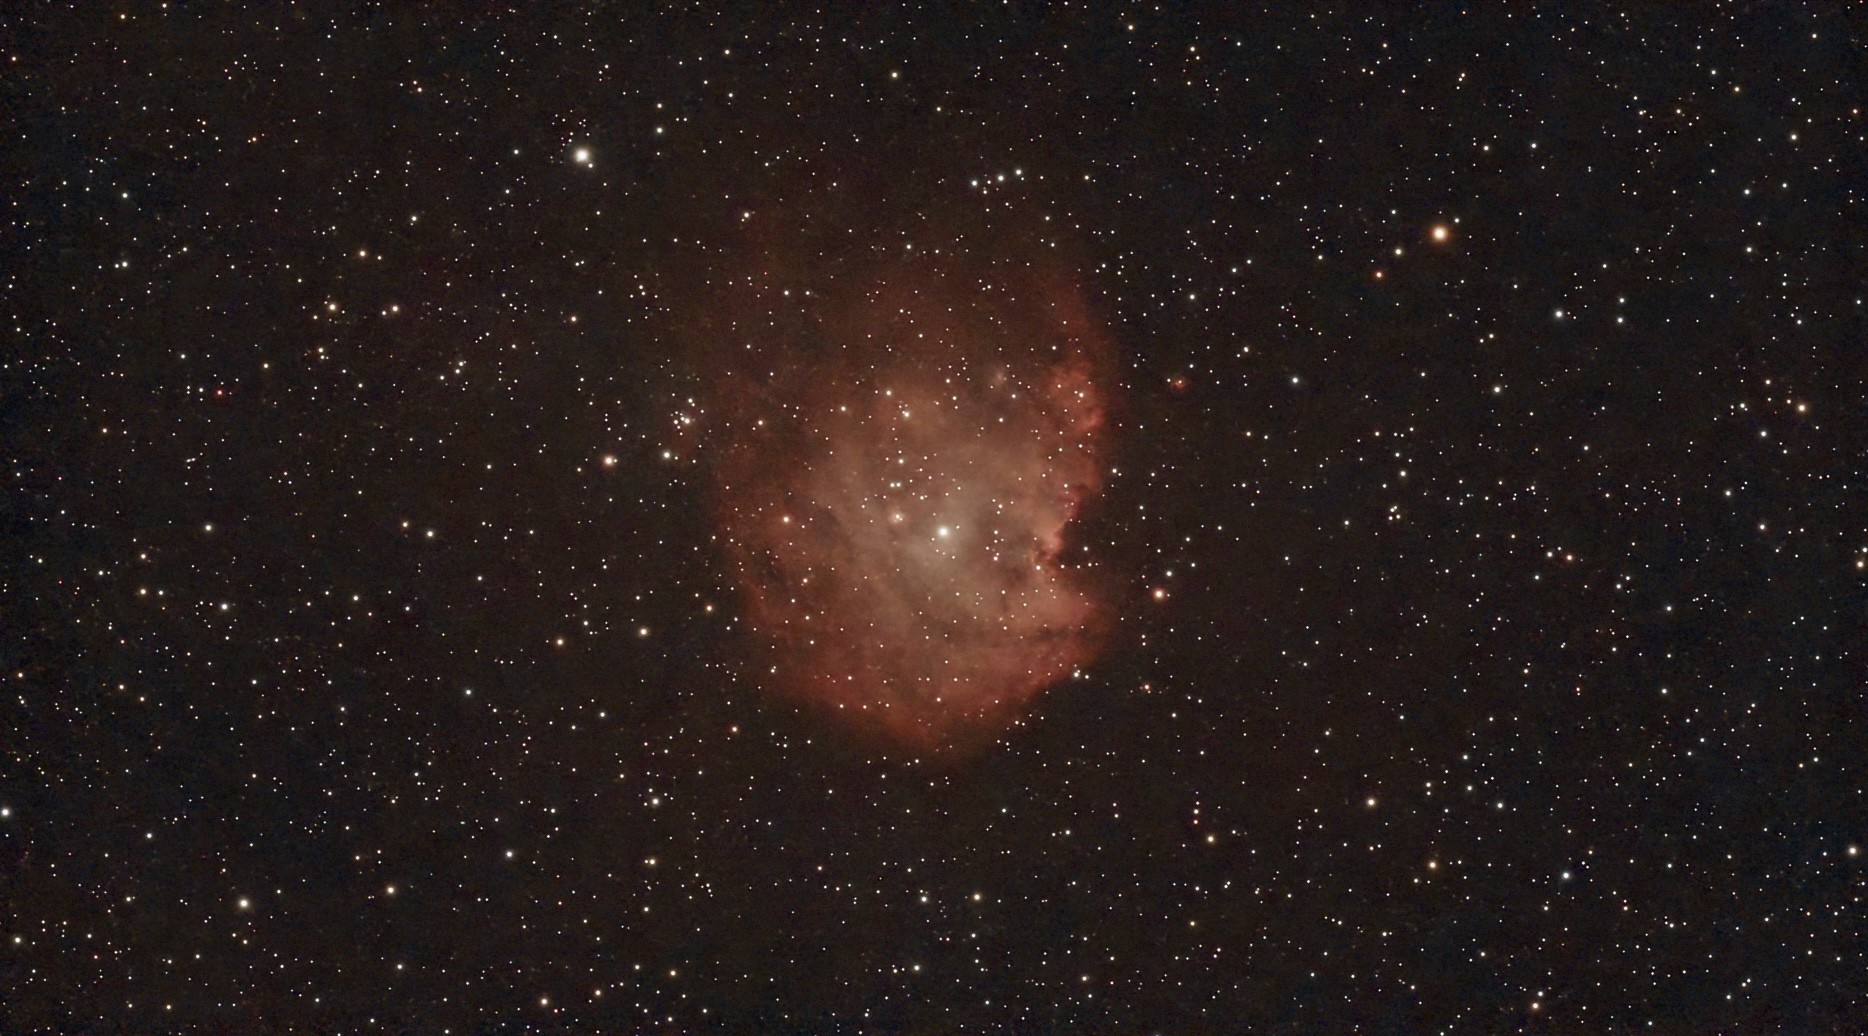
The Monkey Head Nebula — NGC 2174 — sits at the northern edge of Orion, just a nudge away from the more famous targets in that constellation. It's an emission nebula energised by a cluster of young, hot stars at its core, and once you see the sculpted pillars and curved rim that give it its name, it's hard to unsee the face. This was the target I chose for the DWARF Mini's first serious night out, and it didn't disappoint.
Orion is one of the best constellations for narrowband work from the New Forest in winter — it climbs well above 30 degrees at transit from Hampshire, and the sheer density of hydrogen-alpha targets in and around the constellation means there's always something worth pointing at. The Monkey Head sits at around the same altitude as the Horsehead, which made it a comfortable session without the atmospheric frustrations you get when pushing targets low to the horizon.
About the Target
NGC 2174 (also catalogued as Sharpless 252) is an HII region — a cloud of ionised hydrogen gas and dust roughly 6,400 light-years away. The central open cluster, NGC 2175, is the engine behind the emission: its young O-type stars pour out ultraviolet radiation that strips electrons from surrounding hydrogen atoms, and the characteristic red-pink glow we capture is the light emitted when those electrons recombine. The dusty lanes and pillar structures visible in longer integrations are regions where denser gas is actively resisting ionisation — stellar nurseries in the truest sense.
At around 40 arcminutes across, the Monkey Head fits neatly into the DWARF Mini's field of view, which made it an ideal first test for the smaller scope. The dual-band filter on the Mini really earns its keep on targets like this — the Hα emission is strong enough that even modest integration times produce a clearly defined nebula, and the OIII channel adds the subtle blue-green tones to the core region.
The Capture
Session Details
| Parameter | Value |
|---|---|
| Telescope | DWARF Mini Smart Telescope |
| Filter | Dual-Band (Hα / OIII) |
| Location | New Forest, Hampshire · Bortle 4 |
| Date | January 2026 |
| Integration time | ~2.5 hours |
| Sub-exposure | 15 seconds |
| Altitude at transit | ~40° above horizon |
| Stacking | DWARFLAB Stellar Studio |
| Post-processing | DWARFLAB Stellar Studio · Apple Photos |
| Conditions | Seeing: good · Transparency: very good |
The DWARF Mini had been sitting in its box since it arrived, so this was genuinely first light — straight out of the packaging, onto the tripod, aligned in around three minutes. The setup experience is noticeably faster than the DWARF 3 simply because there's less to physically position. The EQ mode initialised cleanly and tracking held throughout the session with no manual correction needed.
I ran the session for just under three hours, starting roughly thirty minutes after NGC 2174 cleared the tree line to the east and running until it began to descend on the other side. The in-app stacking showed strong Hα signal building up within the first forty-five minutes, which gave me confidence to leave it running and head inside. One of the genuine joys of smart telescope life.
The dark-frame filter — one of the Mini's three built-in filters — automatically captures calibration frames throughout the session to suppress thermal noise. It's a small thing but it makes a real difference to the background cleanliness in the final stack, particularly on longer winter nights when the sensor is working hard.
At 840g and genuinely pocket-sized, the DWARF Mini is the grab-and-go smart telescope I didn't know I needed. The triple built-in filter system — Dark-Frame, Astro, and Dual-Band — means you're always using the right glass for the conditions, automatically.
Affiliate link — I earn a small commission at no extra cost to you.
Processing
The stack came out of Stellar Studio with a strong Hα-dominant result — warm pinks and oranges throughout the nebula body, with the central cluster region slightly overexposed in the initial auto-stretch. I used Stellar Studio's processing tools to handle the channel balance, then moved into Apple Photos for the final colour and contrast work.
The goal was to preserve the warm tones of the hydrogen emission while lifting the OIII enough to show the subtle colour differentiation in the central cavity. I kept the star reduction aggressive — the Monkey Head has a dense star field from our perspective and the brighter cluster members can easily dominate the frame if you're not careful. The nebular structure underneath was cleaner than I expected for 30mm of aperture.
I'm genuinely impressed with what the Mini resolved in 2.5 hours. The pillar structures along the eastern rim are visible, and the curved rim of the nebula that gives it its name reads clearly even at a glance. This is the same target that needs several hours on a traditional rig to pull out this level of detail — the dual-band filter does the heavy lifting.
The Result
As a first-light image for the DWARF Mini, the Monkey Head exceeded my expectations. The scope is not the DWARF 3 — the aperture is smaller and the resolution ceiling is lower — but for targets where the signal is strong and the field of view is well-matched, it produces results that stand on their own. The Mini's longer equivalent focal length (around 1,016mm full-frame equivalent versus the DWARF 3's 737mm) actually frames the Monkey Head more tightly, which suits the target well.
The two scopes now complement each other in the kit bag in a way I hadn't fully anticipated. The Mini earns its place not just as a portable backup but as the right tool for specific targets — compact nebulae, lunar work, and sessions where the priority is speed of deployment over maximum aperture. This session was a convincing argument for keeping both running simultaneously on clear nights.